Multi-floor navigation for robot dogs: stairs, elevators and map switching
Updated 2026-11-08 · YUANZHI ROBOTICS engineering team
A robot dog that patrols one floor needs one map. A robot dog that patrols a building needs to know which floor it is on, how to get to the next one, and how to pick up its position again after it arrives. This guide covers map structure, floor detection, stair and lift transitions, map switching, failure handling and what the building owner must provide.
Per-floor maps or one 3D map
There are two common ways to describe a building to the navigation stack.
- One 2D map per floor, linked by transitions. Each floor has its own occupancy grid and its own coordinate frame. A small graph records where the floors connect: the foot and head of each staircase, each lift door. The planner finds a route through that graph, then plans normally inside each floor. It is light on computing and easy to edit.
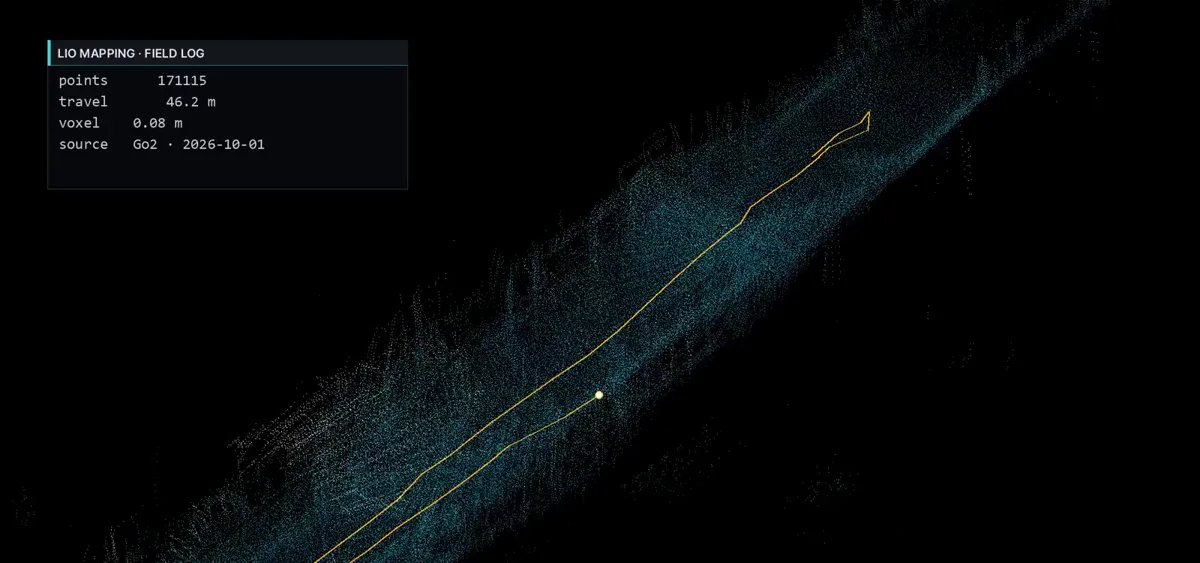
- One 3D map of the whole building. A single LiDAR point cloud covers every floor and the stairwells between them, and the robot localises in 3D. Stairs become ordinary terrain and there is no explicit switch. The cost is more memory and computing and harder editing, and a moving lift car still cannot be represented as static geometry.
In practice most deployments end up with a hybrid: a 3D map is built during the survey, then sliced into per-floor layers for planning, with the staircases kept as 3D segments. Lifts are always handled as transitions, because the robot is stationary relative to the car while the car moves.
Knowing which floor the robot is on
A planar localiser can match equally well on two floors with the same layout, so the floor is tracked as explicit state, not inferred from scan matching alone. Sources, used together:
- Transition bookkeeping. The robot knows it entered a staircase on floor 2 heading up, so it expects floor 3 at the top.
- Height from LiDAR-inertial odometry. The vertical component of the odometry gives the change in height across a staircase and is dependable over one flight.
- Barometer. Pressure change gives relative height over the few minutes of a lift ride. It drifts with weather and ventilation, and lift shafts and stairwells can be pressurised, so it confirms a floor change rather than defining the floor.
- Map matching with distinctive features. After arrival, the robot scores its scan against each candidate floor map. Floors that look identical need distinguishing features near the arrival point, or a fiducial marker at each landing and lift lobby.
Stairs as a transition
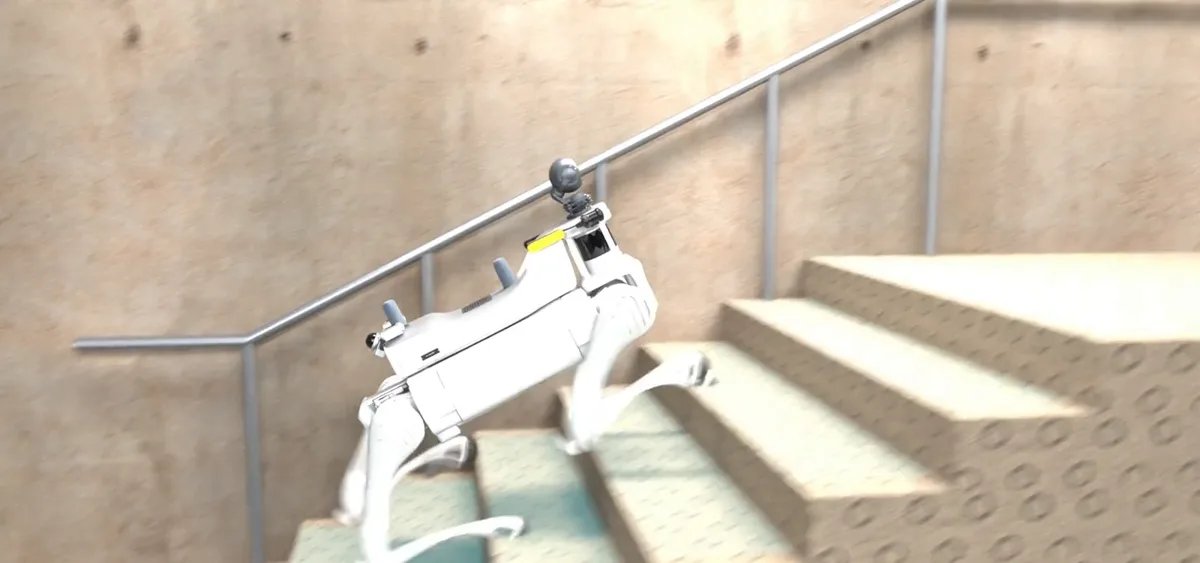
Stairs are handled as a separate mode, and manufacturer limits are the first check. Boston Dynamics, for example, publishes a maximum step height of 300 mm and slopes of plus or minus 30 degrees for Spot, and states stair compatibility as stairs that meet US building code, typically a 7 in rise for a 10 to 11 in run. For other models, use the figures in the manufacturer's own datasheet; where a stair specification is not published, test on the actual staircase before committing to a route.
A stair transition usually runs in four steps:
- Approach. The robot drives to a recorded pose at the foot or head of the flight, square to the first step.
- Detection and alignment. The perception stack confirms the staircase in the depth or LiDAR data, measures the first step edge and aligns the heading to the stair axis. A robot that reaches the staircase but does not detect it should stop, not guess.
- Gait mode. The robot switches to its stair or climbing gait and reduces speed, and the navigation layer stops planning freely: the robot follows the stair axis. Obstacle checks stay active for people on the stairs.
- Landing handover. At the top or bottom the robot steps onto the landing, returns to its normal gait, switches the active map to the new floor and relocalises from the known landing pose.
Spiral stairs, open risers, wet steps and gratings are checked on site; unsuitable staircases are marked as blocked transitions.
Elevators
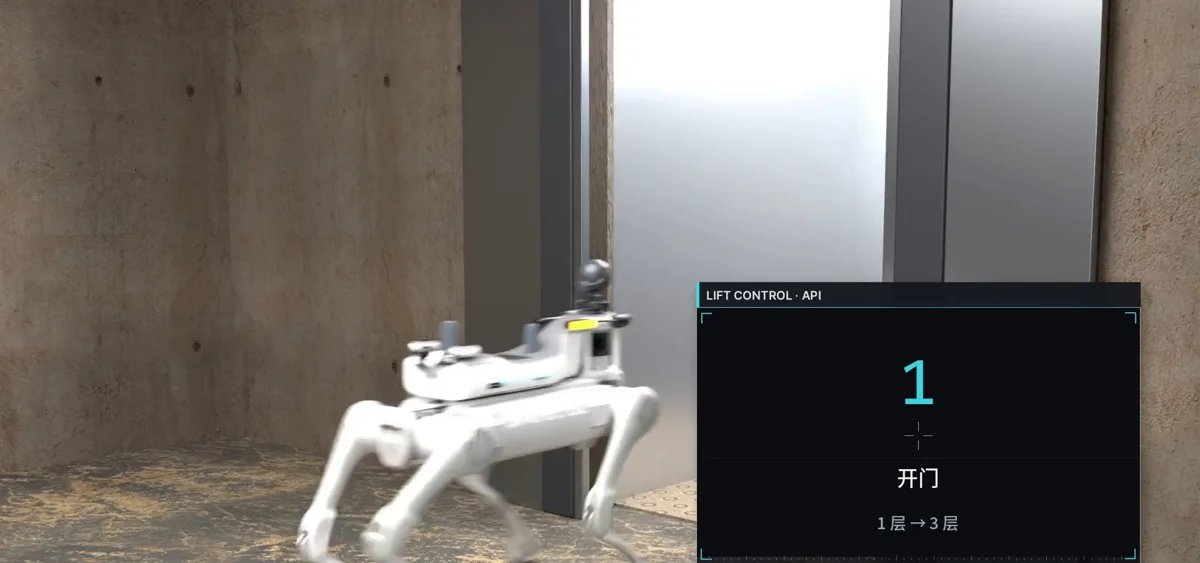
A lift poses three problems the robot cannot solve by walking: calling the car, choosing the floor, and knowing that the car has arrived at the right floor with the doors open.
Calling the lift
- Through the lift controller. The robot, or a server it talks to, sends a call and destination request to the elevator system and receives status back: car position, door state, arrival. Some lift manufacturers offer this as a product; KONE, for example, publicly describes a Service Robot API for connecting cleaning, delivery and security robots to its elevators, alongside an Elevator Call API. Access terms and interface details are agreed with the lift company and are not public in full. For older lifts, an IoT interface board wired to the call buttons and floor signals by the lift maintainer gives a similar result.
- With an arm or button pusher. A robot dog fitted with an arm, or a dedicated pushing mechanism, presses the physical buttons and reads the floor indicator with a camera. It needs no work on the lift, but depends on button layout, lighting and crowds, and gives no reliable door or arrival signal.
Entering, riding and leaving
- Wait at a recorded lobby pose clear of the doors.
- Confirm the doors are open from the controller signal where available, and from LiDAR or depth data showing free space inside the car.
- If the car is too full, let it go and call again.
- Enter, turn to face the door and hold a fixed position. While the car moves, the localiser is paused or set to ignore motion, since the scan shows a static box.
- On arrival, confirm the floor from the controller status, the barometer height change and, after leaving the car, map matching in the lobby. Only then switch the active map and continue.
Map switching and relocalisation
Each transition stores a pair of poses: where it leaves one floor and where it arrives on the other. On arrival the navigation stack loads the new floor map, seeds the localiser with the arrival pose, lets it converge over a few scans, and checks the match score against a threshold set during commissioning. If the score is low, the robot holds position, turns slowly to see more structure, or reports for help. Starting a route on the wrong map is the error to design against.
Failure handling
| Situation | Expected behaviour |
|---|---|
| Lift does not arrive or call is rejected | Retry after a set time, then reroute by stairs if allowed, otherwise report and wait |
| Doors close while entering or leaving | Stop, back out to the lobby pose, call again |
| Arrived floor does not match the request | Stay inside, request the correct floor, do not leave the car |
| Wireless link lost in shaft or stairwell | Finish the current transition on board, resume telemetry on the landing |
| Low localisation score after map switch | Hold position, try relocalisation, then ask an operator |
| Staircase not detected at approach pose | Do not climb; mark the transition unavailable and report |
| Low battery before a transition | Do not start stairs or lift; return to a charger on the current floor |
What the building owner must provide
- Lift interface. Agreement with the lift owner and maintainer for an API connection or an interface board, including who installs it and who is responsible for it.
- Network coverage. Wi-Fi or private cellular in lobbies, stairwells and, where possible, inside the lift car and shaft. Without it the robot must complete every transition on board, offline.
- Permitted routes. Which staircases and lifts the robot may use, at what hours, and whether it may share a car with people.
- Access. Stairwell and lobby doors that the robot can pass, either held open or connected to the access control system.
- Survey time. Time on every floor to build and check maps and to record and test each transition.
YUANZHI ROBOTICS builds the sensor payloads and software that make this work on robot dogs and UGVs: LiDAR mapping, floor tracking, stair and lift transitions and the operator console. Our entry mapping kit starts from US$2,000, the complete inspection kit from US$8,690, and the Jetson Orin NX 16 GB computer is US$2,290. Send us the robot model, the task, the building or site and the delivery country, and we will tell you what the lift and network side will need before you commit.
FAQ
Should a multi-floor site use one 3D map or one map per floor?
Most deployments use per-floor 2D maps for planning, linked by a graph of stair and lift transitions, often sliced from a 3D survey map. A single 3D map handles stairs naturally but costs more computing and is harder to edit, and lifts still have to be handled as transitions.
How does the robot know which floor it is on?
It keeps the floor as explicit state, updated at each transition. Height change from LiDAR-inertial odometry and a barometer confirms the move, and matching the scan against the new floor map confirms the arrival. Floors with identical layouts need distinctive features or markers at landings and lobbies.
Can a robot dog use a lift without any change to the lift?
Yes, with an arm or button pusher and a camera reading the floor indicator, but it depends on button layout, lighting and crowds and gives no reliable door or arrival signal. For routine operation, an API or interface board connected to the lift controller is the dependable option.
What stairs can a robot dog climb?
It depends on the model; check the manufacturer's datasheet. Boston Dynamics publishes a 300 mm maximum step height for Spot and stair compatibility with US building code stairs, typically 7 in rise for 10 to 11 in run. Where a model's stair limits are not published, test on the actual staircase.
What happens if Wi-Fi drops in the lift or stairwell?
The robot should finish the current transition on board without the network and resume telemetry once it reaches the landing or lobby. Coverage in lobbies and stairwells is still needed for monitoring, and for the lift API if the lift is called from a server.